Operators for Managing the Behaviour of Virtual Users
WAPT Pro provides you with a number of operators to manage the
behaviour of virtual users and add more reality to your tests.
The following operators are available in WAPT Pro:
![]() Bookmark
Bookmark
![]() JavaScript
JavaScript
![]() Loop
Loop
![]() While
While
![]() If Then Else
If Then Else
![]() Random
Random
![]() Task
Task
![]() Delay
Delay
![]() Rendezvous Point
Rendezvous Point
![]() Completion Point
Completion Point
![]() Stop Request
Stop Request
![]() Stop Session
Stop Session
![]() Stop User
Stop User
![]() Stop Test
Stop Test
 You can insert any of these operators in the sequence of recorded requests of any profile. Select any request in the Navigation Pane, then click on the arrow next to the Add button on the toolbar and select a desired operator in the displayed list.
Or you can right-click on the name of any profile in the Navigation Pane and select an operator on the context menu. A new operator is added to selected profile.
You can move the operator to another place of test sequence: simply drag&drop it on desired place. You can move operators between profiles as well.
If you select several requests and add a new operator, then all selected requests are placed inside the new operator.
Bookmark
This operator allows inserting a bookmark after any request in the test sequence.
Select a page in the Navigation Pane and click Add -> Bookmark on the toolbar to insert a bookmark
after that page. Bookmarks are useful when you need to find some place in the test sequence quickly.
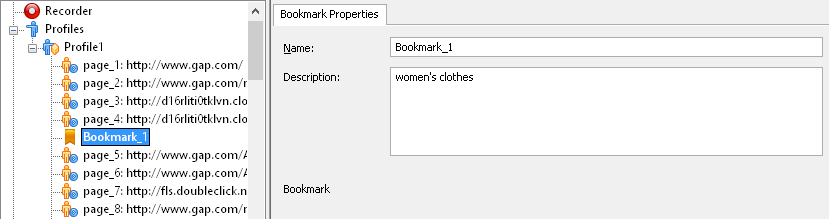
You can change the name of bookmark and enter some description.
You can add bookmarks in the sequence of requests just during the
recording process.
JavaScript
WAPT Pro allows the execution of JavaScript within virtual user profiles.
You can insert the JavaScript operator when you design virtual user's
behaviour.
Select a profile in the Navigation Pane and click Add -> JavaScript on the toolbar.
JavaScript operator is identified by name and
contains some script to be executed.
You can change operator's name for more convenience. JavaScript
operators are often used to calculate complex variables, so you can name them, for example,
"Calculate showforum variable" or "Define cat_forum variable" etc.
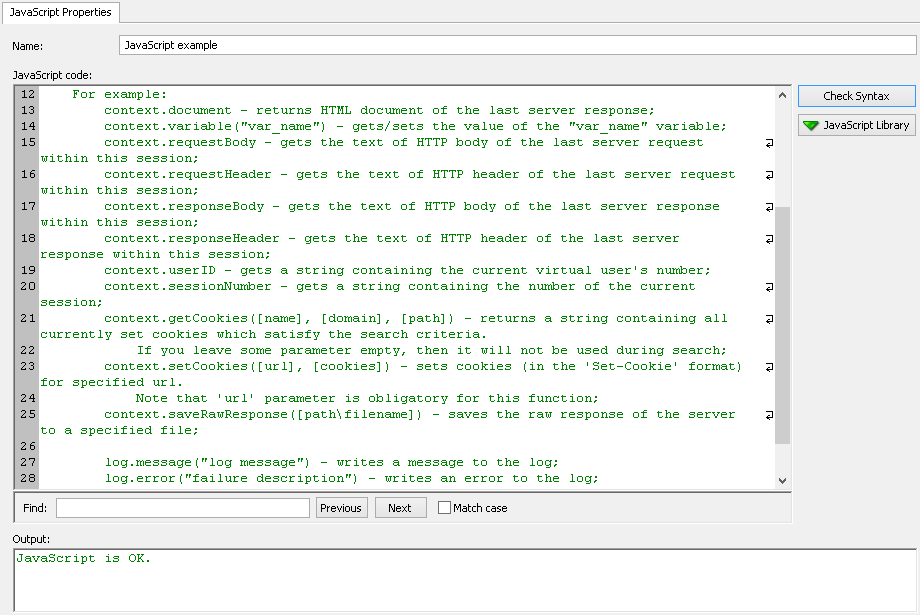
JavaScript code: Here you can enter JavaScript code.
You can use functions defined in one of files of WAPT Pro
JavaScript library.
The library is a set of files with JavaScript functions.
Functions defined in one file can call functions defined in other files within the library.
In addition to standard objects and functions, there are 2 objects in WAPT Pro
that you can use in JavaScript code.
These objects are context and log.
![]() context:
The properties of this object allow you to get some information about the current state of virtual user and also
manage variables. The properties are listed below.
context:
The properties of this object allow you to get some information about the current state of virtual user and also
manage variables. The properties are listed below.
![]() context.document -
returns HTML document of the last server response.
context.document -
returns HTML document of the last server response.
![]() context.variable("var_name") -
returns or sets the value of the "var_name" variable.
Using this property you can change values of variables. It is supposed that variables were defined earlier.
context.variable("var_name") -
returns or sets the value of the "var_name" variable.
Using this property you can change values of variables. It is supposed that variables were defined earlier.
![]() context.requestBody -
gets the text of HTTP body of the last server request within this session.
context.requestBody -
gets the text of HTTP body of the last server request within this session.
![]() context.requestHeader -
gets the text of HTTP header of the last server request within this session.
context.requestHeader -
gets the text of HTTP header of the last server request within this session.
![]() context.responseBody -
gets the text of HTTP body of the last server response within this session.
context.responseBody -
gets the text of HTTP body of the last server response within this session.
![]() context.responseHeader -
gets the text of HTTP header of the last server response within this session.
context.responseHeader -
gets the text of HTTP header of the last server response within this session.
![]() context.userID -
gets a string containing the current virtual user's number (starts from 0).
If you want to use it as a number, you should convert it with the help of parseInt()
function.
context.userID -
gets a string containing the current virtual user's number (starts from 0).
If you want to use it as a number, you should convert it with the help of parseInt()
function.
![]() context.sessionNumber -
gets a string containing the number of the current session
(starts from 0).
context.sessionNumber -
gets a string containing the number of the current session
(starts from 0).
![]() context.getCookies([name], [domain], [path]) -
returns a string containing all currently set cookies
which satisfy the search criteria. If you leave some parameter empty, then it will not be used during the search.
context.getCookies([name], [domain], [path]) -
returns a string containing all currently set cookies
which satisfy the search criteria. If you leave some parameter empty, then it will not be used during the search.
![]() context.setCookies([url], [cookies]) - sets cookies
(in the 'Set-Cookie' format) for a specified url.
Note that 'url' parameter is obligatory for this function.
context.setCookies([url], [cookies]) - sets cookies
(in the 'Set-Cookie' format) for a specified url.
Note that 'url' parameter is obligatory for this function.
![]() context.saveRawResponse([path\filename]) - saves
the raw response of the server to a specified file.
This function returns 'true' (if the response was successfully saved to the specified file) or 'false' (in case of error).
context.saveRawResponse([path\filename]) - saves
the raw response of the server to a specified file.
This function returns 'true' (if the response was successfully saved to the specified file) or 'false' (in case of error).
![]() log: You can use this object
to write information or error messages to virtual user log.
There are 2 methods for this object.
log: You can use this object
to write information or error messages to virtual user log.
There are 2 methods for this object.
![]() log.message("log message") -
writes a message to the log;
log.message("log message") -
writes a message to the log;
![]() log.error("failure description")
- writes an error to the log.
log.error("failure description")
- writes an error to the log.
Inside the JavaScript code you can use all WAPT Pro internal variables.
You can read and assign their values.
Check Syntax: You can check the syntax of written JavaScript code. Click this
button and the program will check your script for syntax errors. Results of the check
will be displayed in the Output field.
JavaScript Library: Click this button and you will see the list of files included in the library.
If you select some file in the list, you will see a new window with the displayed JavaScript code of selected file.
You can add new files to the library. Click JavaScript Library -> Add JavaScript File... button
and you will switch to the settings dialog
where you can add new files to the library.
Find: You can search for some text string in the written JavaScript code.
Type the text that you want to find. The program will highlight all occurrences of the entered text.
Use the Previous and Next buttons to move to the previous/next occurrence of the text.
Note that any JavaScript error is considered to be session error, so it stops execution of the current session.
Calling the log.error method from JavaScript is also considered to be JavaScript error (session error).
Loop
Web site users often perform
iterative actions like surfing a product catalog or forum, searching for a specific product or topic,
adding products to basket and so on. To emulate iterative actions in your tests, you can use
the Loop operator.
This operator allows repeating a sequence of page requests or operators a number of times.
To add the Loop operator, select a profile in the Navigation Pane and click
Add -> Loop on the toolbar.
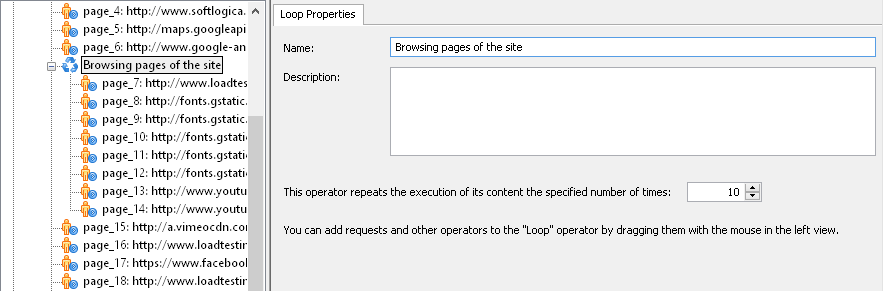
You can change operator's name (for example, name the loop as "Surfing a product catalog" or "Adding products to basket").
Specify how many times this operator should repeat the execution of its content.
If you want to put a page request in the loop, select that request in the Navigation Pane
and drag&drop it on the Loop operator. In this way you can put as many pages in
the loop as you need.
You can add any other operators to the Loop operator as well.
To do this, you should first add a desired operator to the sequence of requests
using the Add button on the toolbar
and then drag&drop that operator on the Loop operator.
Using the Loop operator, you can add more reality to your tests. You can divide
the session of virtual user into 3 parts:
1. Initial actions - for example, login or registration. This part consists of pages that are performed once
at the beginning of user session.
2. Main Loop - iterative actions like surfing a catalog or forum and so on.
You can form the sequence of requests that should be repeated several times during a user session and put
them to the Main Loop.
3. Final actions - for example, finalizing a purchase or logout. This part
consists of pages that are performed once at the end of user session.
If you organize the test sequence of some profile in this way, then the session of each virtual user of that
profile will include a single execution of Initial actions, then the repeat of Main Loop, and at the end a single
execution of Final actions.
For each loop that you add to the test sequence,
WAPT Pro creates a special variable - the number of iteration.
If, for example, you name a loop as Main Loop, the program creates a variable Main Loop_iteration.
Its initial value is 0 and after each iteration it increases by 1.
Suppose, you have two loops Loop1 and
Loop2; the first one iterates 4 times, the second - 3 times. Loop iterations will be calculated in the following
way:
Loop1_iteration = 0
Loop2_iteration changes from 0 to 2
Loop1_iteration = 1
Loop2_iteration changes from 3 to 5
Loop1_iteration = 2
Loop2_iteration changes from 6 to 8
Loop1_iteration = 3
Loop2_iteration changes from 9 to 11
When the next session begins, the count of loop iterations is continued:
Loop1_iteration = 4
Loop2_iteration changes from 12 to 14
Loop1_iteration = 5
Loop2_iteration changes from 15 to 17
... and so on.
You can use the loop iteration variable to define conditions in the If Then Else and While operators or to
define parameters. For example, you can define some parameter as a result of
$LOrder
function. Select the
Main Loop iteration mode in function properties and enter the list of strings.
Then the function will return the 1-st string from a specified list for the 1-st iteration of the
loop, the 2-nd string - for the 2-nd iteration and so on.
While
This operator also defines a loop which is repeated while a specified condition is found to be true.
If the condition is not fulfilled, the program goes to the next step of user profile.
For example, users of your site may be browsing a forum or product catalog by clicking the "Next" button.
So you can use the While operator to organize a loop that will be repeated while the "Next"
button is displayed on the page.
To add the While operator, select a profile in the Navigation Pane and click Add -> While
on the toolbar.
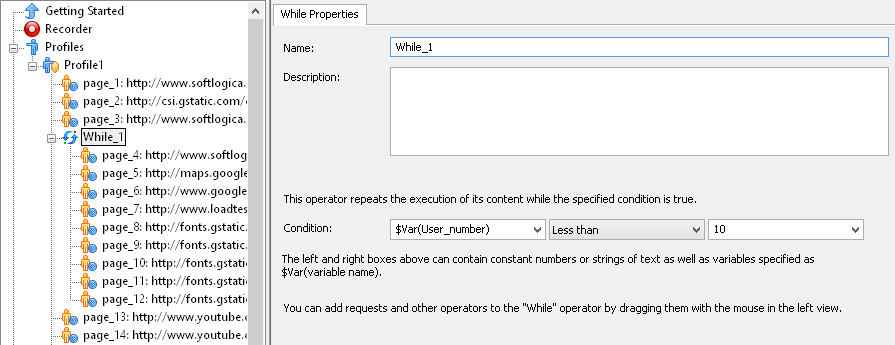
You can change operator's name (for example, name the operator as "While Next, browse forum" or
"While Next, browse product catalog").
Now you should define a condition that will be verified during test run. Select a variable in the first combo-box,
then select an operator in the second combo-box (Equals, Less than, Greater than etc.) and specify some value
in the third combo-box or choose a variable.
Define the sequence of steps that will be executed while the specified condition is found to be true.
For example, you will browse the certain pages.
Select a desired page in the test sequence and drag&drop it on the While
operator. In this way you can put as many pages as you need to the same operator.
You can also add any other operator to the While operator.
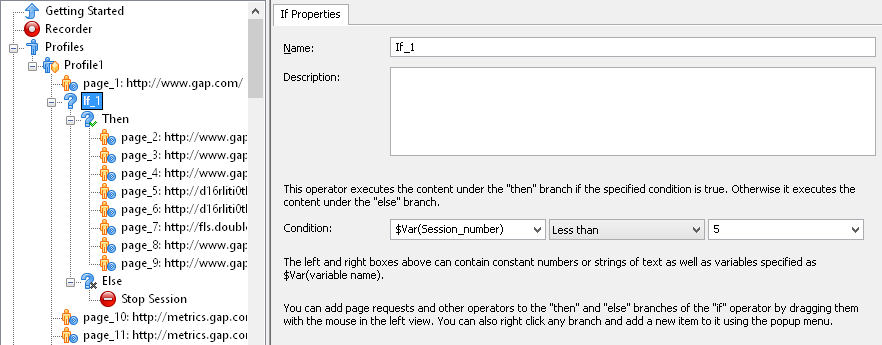
If Then Else
Conditional operator allows defining some condition that will be verified during test run.
If that condition is found to be true, the program executes Then
branch of the operator; otherwise it executes the Else branch.
For example, visitors of your site can be registered or unregistered users.
Registered users can browse all pages of the site, whereas actions of unregistered users are restricted.
So you can verify whether a user has logged on to the site, or not. If the logon procedure
was successful, then the user can browse all pages of the site, otherwise - only some pages.
Another example: you have an online store where users buy different goods.
If the sum of purchase for some user exceeds the certain limit, he gets a discount for further purchases - he sees
a link that will take him to a special discount page.
To add the If Then Else operator, select a profile in the Navigation Pane and click
Add -> If Then Else on the toolbar.
You can change operator's name (for example, name the operator as "If registered, Then browse all pages, Else common
information" or "If the sum of purchase exceeds the limit, Then get discount").
Now you should define a condition that will be verified during test run. Select a variable in the first combo-box,
then select an operator in the second combo-box (Equals, Less than, Greater than etc.) and specify some value
in the third combo-box or choose a variable.
Define the content of Then and Else branches.
For example, you may want to request some pages if the specified condition is fulfilled or not fulfilled.
Select a page in the test sequence and drag&drop it on Then or Else
operator.
You can put as many pages as you need to Then and Else branches.
You can also add any other operator to Then and Else branches, for example, you can insert the
Stop Session operator. Add a desired operator to the sequence of requests
using the Add button on the toolbar
and then drag&drop it on Then or Else operators.
Random
Using this operator you can send requests randomly. For example, if you test a forum, you may
need to imitate the situation when users browse various topics at random. Or, if you test an online store,
users will purchase different products at random.
The Random operator will help you imitate this.
To add the Random operator, select a profile in the Navigation Pane and click Add -> Random
on the toolbar.
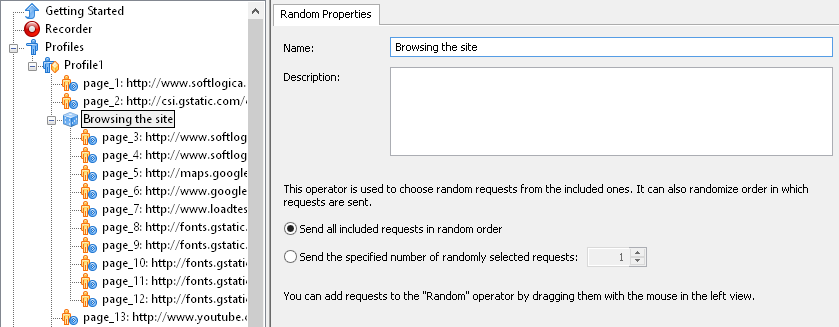
You can change operator's name (for example, name the operator as "Browsing the forum" or "Browsing the product
catalog").
You should define the sequence of requests that will be sent randomly.
Select a request in the left pane and drag&drop it on the Random operator.
In this way you can insert as many requests
as you need in the same Random operator.
Then you should select one of two modes: either to send all included requests, or only some of them.
![]() Send all included requests
in random order:
All requests that you add to the Random operator will be sent
in random order. Note that each request will be sent only once.
Send all included requests
in random order:
All requests that you add to the Random operator will be sent
in random order. Note that each request will be sent only once.
![]() Send the specified number of
randomly selected requests:
If you select this mode, you should specify the number of requests that will
be sent. The program will select this number of requests in random order and send them to the server.
Suppose, for example, that you set this value equal to 3 and add 5 requests to the
Random operator. Then each time the program executes this operator,
it will send randomly any 3 requests from the total 5 ones.
Send the specified number of
randomly selected requests:
If you select this mode, you should specify the number of requests that will
be sent. The program will select this number of requests in random order and send them to the server.
Suppose, for example, that you set this value equal to 3 and add 5 requests to the
Random operator. Then each time the program executes this operator,
it will send randomly any 3 requests from the total 5 ones.
Note that you cannot add other operators to the Random operator.
You can add only requests.
Task
Using this operator you can group several pages relating to the same business action, for example,
submission of a form or making an order, and calculate the total time of their processing,
for statistical purposes.
To add the Task operator, select a profile in the Navigation Pane and click
Add -> Task on the toolbar.
![]()
You can change operator's name (for example, name the task as "Making an order", "Registration", "Payment").
Then you should add requests to the Task operator in the left pane.
Click on a request and drag&drop it on the Task
operator. Click on another request and add it to the task and so on.
You can add other operators inside the Task operator as well, e.g. the Delay
operator.
Select one of the following options which define how to measure the task time:
![]() Task times calculated as a sum of all response times
(values in parenthesis include page resources):
In this case the task time does not include delays between pages. It is the "pure" time of requests processing - without page resources
and including them.
Task times calculated as a sum of all response times
(values in parenthesis include page resources):
In this case the task time does not include delays between pages. It is the "pure" time of requests processing - without page resources
and including them.
![]() Task times calculated as full execution times:
In this case the operator measures the full execution time from the beginning of the Task operator till the completion of all requests
or till the end of user think time of the last request (the choice depends on the event which happens last during the parallel execution of requests).
This time includes all delays between pages.
Task times calculated as full execution times:
In this case the operator measures the full execution time from the beginning of the Task operator till the completion of all requests
or till the end of user think time of the last request (the choice depends on the event which happens last during the parallel execution of requests).
This time includes all delays between pages.
Baseline total response time: It is the baseline time for the whole task. By default, it is calculated as the sum
of baseline times of requests included in this task. In this case the next option Use the sum of baseline times of included requests
is checked. However, if you need to set another value of baseline total response time, you should
uncheck this checkbox and modify the value of baseline time.
The value of baseline total response time is used for calculation of the response time degradation factor
for the current task (PDF). Performance degradation factor is a ratio of the real response time to the baseline time for this task.
It shows the degradation of performance under load.
All calculated values are shown in the Task times table of the
Response Time report.
Delay
This operator allows inserting a delay after any request in the test sequence.
Select a page in the Navigation Pane and click Add -> Delay on the toolbar to insert a delay
after that page.
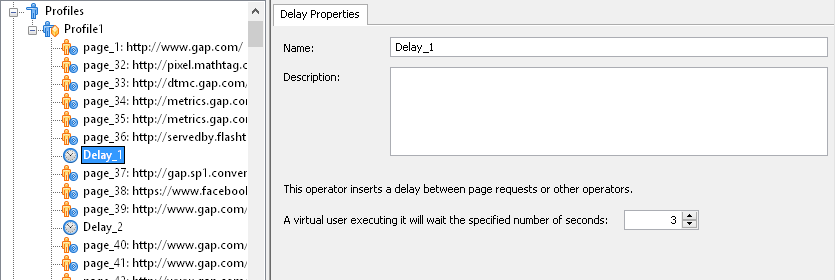
You can change the name of delay (for example, name it as "Delay after login", "Delay on the forum",
"Delay after payment") and specify a value of delay (in seconds).
Rendezvous Point
WAPT Pro has a special operator Rendezvous Point - it is a point
where the specified number or percent of virtual users should meet before they can further execute a profile.
When users reach this point, they stop and wait for other users - they wait until a condition specified in this operator
is fulfilled. After that all stopped users start simultaneously and make the next request of the profile.
To add the Rendezvous Point operator after some request, select that request in the Navigation Pane
and click Add -> Rendezvous Point on the toolbar.
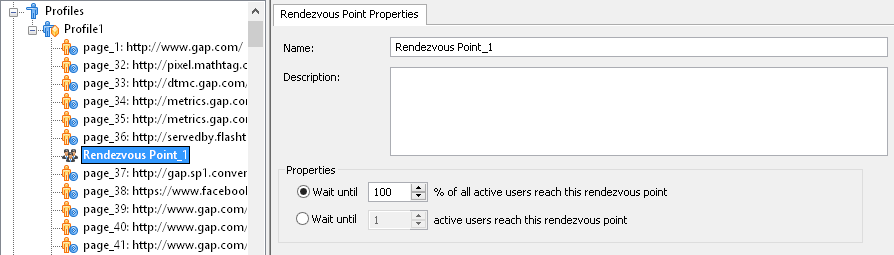
This operator has 2 conditions: percent or number of active (running) users of the current profile
which should meet at this point.
![]() Wait until _ % of all active users reach this rendezvous point:
Specify the percentage of active users of the current profile which should meet at the
rendezvous point. In case of ramp-up load this value is different for different iteration steps.
Wait until _ % of all active users reach this rendezvous point:
Specify the percentage of active users of the current profile which should meet at the
rendezvous point. In case of ramp-up load this value is different for different iteration steps.
![]() Wait until _ active users reach this rendezvous point:
Specify a number of users which should meet at the rendezvous point. This is a constant number
of users for all iteration steps.
Wait until _ active users reach this rendezvous point:
Specify a number of users which should meet at the rendezvous point. This is a constant number
of users for all iteration steps.
When the last user reaches the rendezvous point (it means that the condition is fulfilled), all these users start
simultaneously and make the next request of the profile.
You cannot add operators or requests inside the Rendezvous Point operator.
Completion Point
WAPT Pro has a special operator Completion Point which
forbids execution of subsequent requests until all previous requests are completed.
To add the Completion Point operator after some request, select that request in the Navigation Pane
and click Add -> Completion Point on the toolbar.
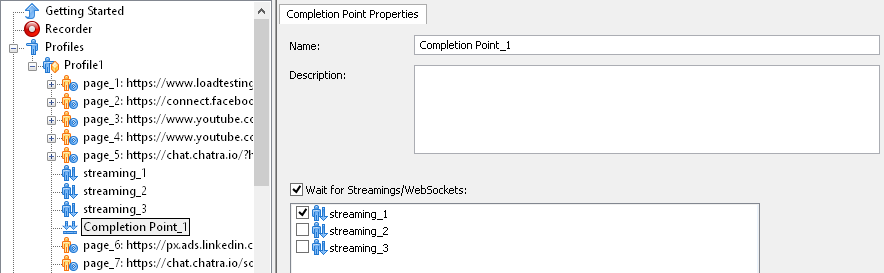
Requests located in the tree view below this Completion Point will be started only after all previous requests are completed.
By default, this operator is not applied to streaming and WebSocket requests. You should manually select requests of these types
if you need to wait for their completion. Turn on the option Wait for Streamings/WebSockets and check the necessary requests in the list.
Stop Request
This operator ends the execution of specified streaming or WebSocket connection.
To add the Stop Request operator after some request,
select that request in the Navigation Pane and click Add -> Stop Request on the toolbar.
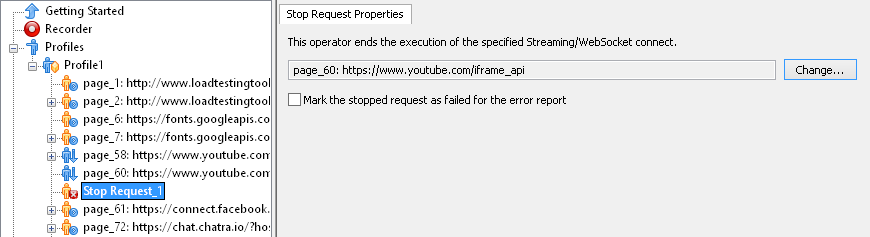
Select a request that should be stopped: click the Change... button and select the necessary request
in the displayed dialog.
Mark the stopped request as failed for the error report:
If you check this option, then the stopped request will be marked as failed in the error report. This error will be included in test
statistics. Otherwise, if this option is not checked, the stopped request will be considered successful.
Stop Session
This operator stops the execution of the current session.
If you insert it after some request in the test sequence, the program will request all pages
before the Stop Session operator and then start a new session of the same profile.
This operator is often used
in Then or Else branches of If Then Else operator. For example,
if a specified limit is not exceeded, the user browses the certain pages of the site; otherwise user session is
interrupted.
To add the Stop Session operator after some request,
select that request in the Navigation Pane and click Add -> Stop Session on the toolbar.
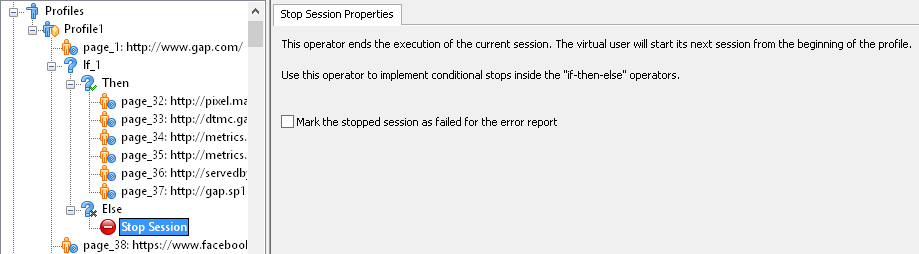
There is a special option which defines whether the current session will be considered successful or not.
Mark the stopped session as failed for the error report: If you check this option, then the stopped session
will be marked as failed in the error report. This error will be included in test statistics. Otherwise, if this option is not checked,
the stopped session will be considered successful.
Stop User
This operator stops the execution of the current virtual user. This user will not participate in the running test any more.
You may need this operator when you use functions depending on the virtual user's number. For example, those users
who completed some action on the site can be stopped with the help of this operator.

Mark the stopped session as failed for the error report:
If you check this option, then the stopped session will be marked as failed in the error report. This error will be included in test
statistics. Otherwise, if this option is not checked, the stopped session will be considered successful.
Stop Test
In addition to the Stop Session operator, you can use the Stop Test operator that interrupts the entire
test execution.
This operation is not momentary. The program waits until the
already requested URLs are loaded and then interrupts the test.
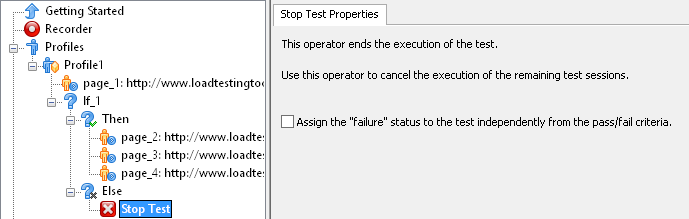
Assign the "failure" status to the test independently from the pass/fail criteria:
If you set this option, then the test gets the status "failure" when this operator stops the test.
You can see the status of test run
in the "Test result" field of the Summary report and HTML report. If this option is not set, then the status "success" or "failure"
depends only on the results of passing the pass/fail criteria.
WAPT Pro writes information about the work of operators to log file.
For details see the topic Logging the Work of Operators.
![]()