Cloud Engine in Amazon EC2
WAPT Cloud Engine is a load generating unit for WAPT Cloud and WAPT Pro load testing tools. The engine can be launched in Amazon EC2 and used either from the same cloud environment or from any other location where you run WAPT Pro.
Here is a short instruction on how to launch an engine and integrate it with WAPT Cloud or WAPT Pro.
[1] It is supposed that you know basics about using Amazon EC2 service.If you are not familiar with that, you can read how to run WAPT Cloud instance here.
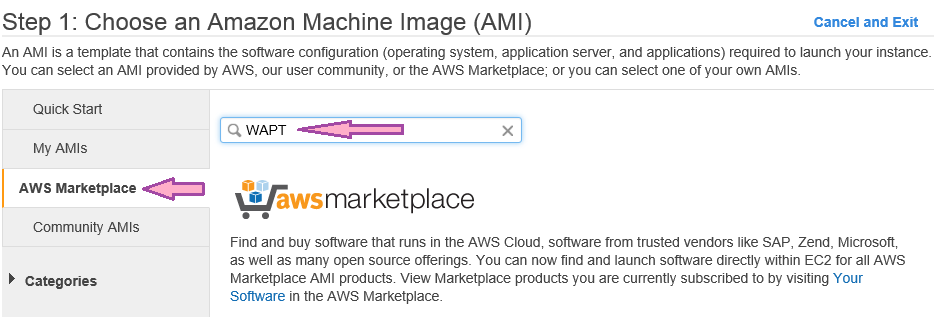
[2] Login to your AWS account, EC2 console and choose "AWS Marketplace" in the left view.
[3] Enter "WAPT" in the search field to the right. Press "Enter" to run the search.
[4] You will find WAPT Cloud and three types of Cloud Engines with different capacities (2,000, 5,000 and 10,000 virtual users). Choose the one you would like to launch and click the "Select" button to the right of it.
[5] You will get to the next screen where you can choose the instance type. It is recommended to run higher capacity engines on more powerful system configurations. You should also take in account the parameters of your test. If it requires high CPU usage, choose from compute optimized instances. If you need to transfer large amounts of data in your test, chose one with high or "10 Gigabit" network performance.
[6] For advanced users: Cloud Engine requires port 9477 to be available for incoming TCP connections. The default security group for the engine instance contains this rule. If you apply your own security group, you should make sure that this port is open.
[7] Click the "Preview and Launch" button at the bottom of the page and the "Launch" button on the next page. Download the key pair file. (You will only need it if you want to re-configure the engine, which is not normally required.)
[8] After the instance is launched, you will see its public DNS name and IP address in the list of instances.

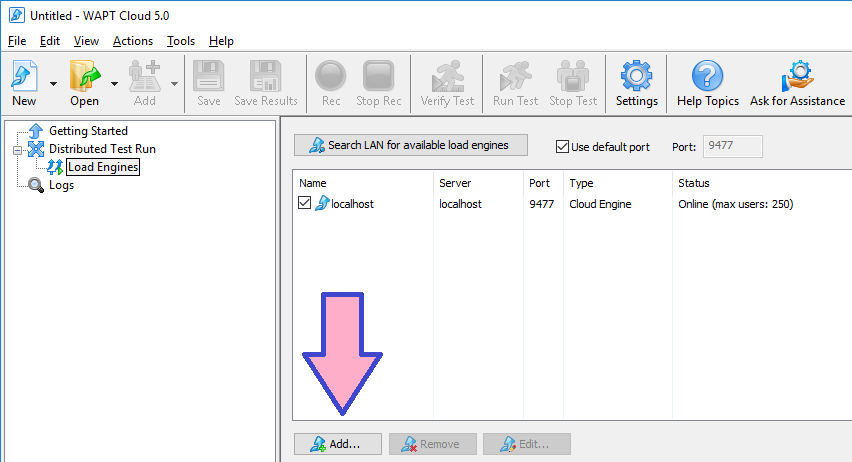
[9] Open the WAPT Cloud window and select the "Load Engines" page in the left view. The right view will contain the list of engines. Click the "Add" button under the list.
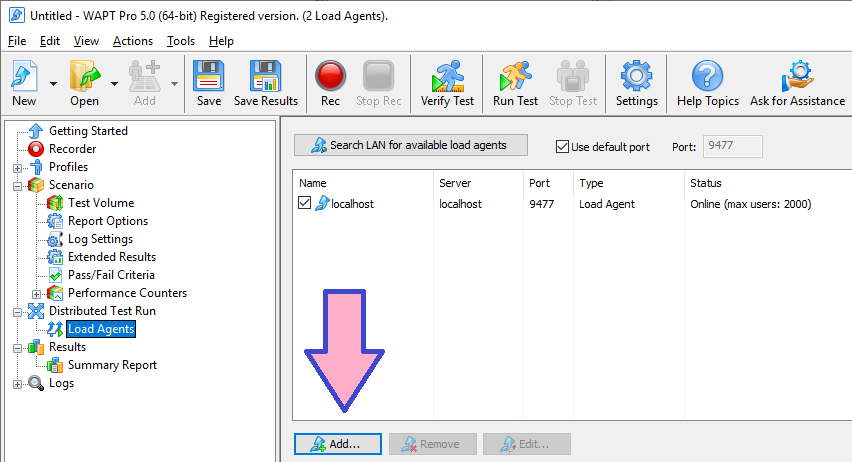
[10] If you use WAPT Pro, open the "Load Agents" page and click the same "Add" button.
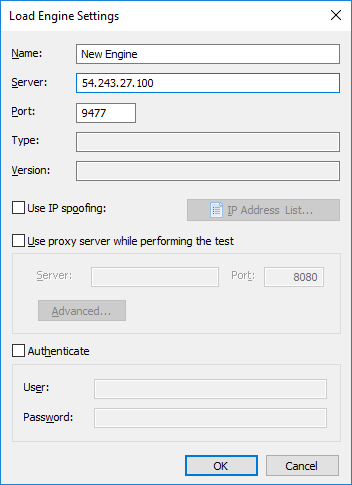
[11] Enter the engine IP address to the new engine settings dialog and click "OK".
[12] The engine will be added to the list. You can put a checkmark near it to select it for running the test. If you need more engines, you can repeat this procedure for them.