How to Create a Performance Test for a Mobile Application
WAPT tools can be used to create and run load tests for a mobile application. Such tests actually check the performance of the server part of the application.
The client application working on a mobile device will be used only to record a typical user session. Once recorded to a virtual user profile and configured
with the session-specific values, it can be replicated to spawn multiple copies during a test. Such emulation is done by the testing tools solely and does not
require interaction with the client device anymore.
To record a mobile session WAPT needs to be inserted in the communication channel as a proxy between the device and the application backend to which it
communicates. This can be done by running WAPT Recorder in the "Manual Configuration" mode while specifying Recorder IP address and port number as the HTTP
proxy in the Wi-Fi connection settings on the device.
Recording requirements
Before starting you need to check a few conditions.
- Your mobile application uses HTTP or HTTPS protocol for communication with the server.
- The mobile device is connected to a network from which it can have direct access to the system running WAPT. Usually this is done by using Wi-Fi connection to the same LAN.
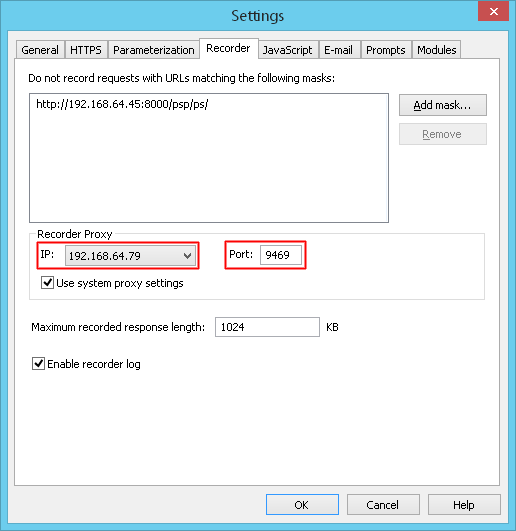
- Windows Firewall (and any other security software) on the WAPT system allows incoming connections from remote systems to the IP address and port used by WAPT Recorder.You can select that IP and specify port number in WAPT settings on the "Recorder" tab. See instruction on how to configure Windows Firewall here.
Starting Recorder
Check that the IP address and port number is specified correctly. Note that you cannot use "localhost" in this case:
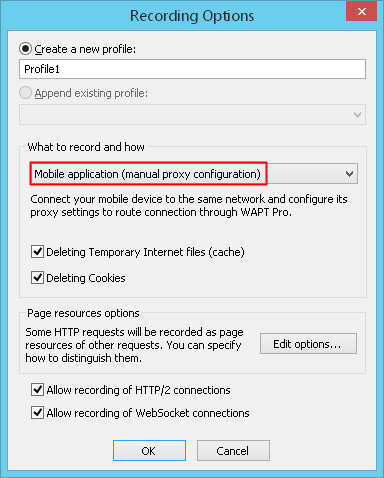
Click the "Rec" button on the toolbar and select the "Manual Configuration" mode in the "Recording Options" dialog:
After clicking "OK" you will see a message in the Recorder window:
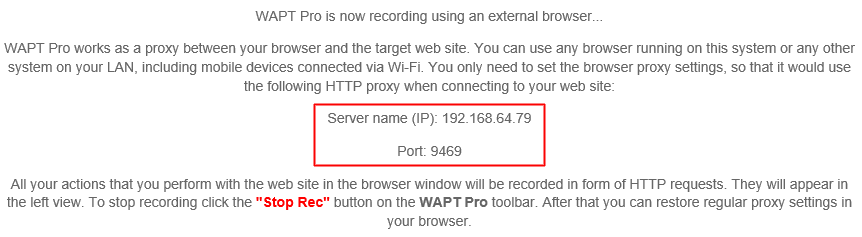
Use this data to specify the proxy server in the Wi-Fi connection settings on your mobile device.
Mobile proxy setup
Android
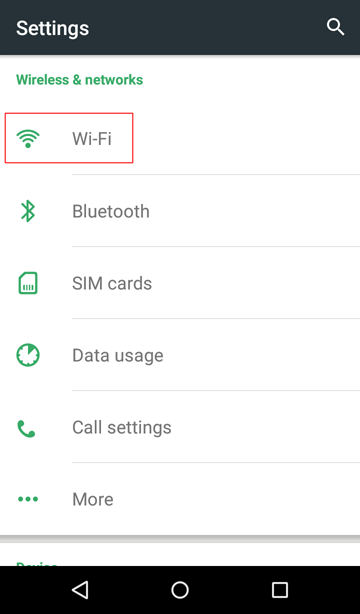
- Go to Settings. Depending on the Android version you may need to choose "Connections" or another similar option. Tap "Wi-Fi":
- Select the current Wi-Fi connection from the list and check "Advanced options". On other Android versions you may need to tap one
of the icons next to the connection name or tap and hold the connection name.

- Specify the following proxy settings for the selected Wi-Fi connection:
Proxy: select "Manual".
Proxy hostname: specify the server name or IP address of WAPT Recorder (the one shown in the Recorder message above).
Proxy port: specify the port number of WAPT Recorder (the one shown in the Recorder message above).
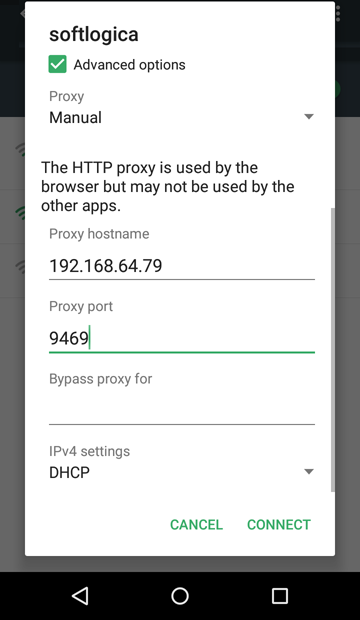
- Tap "CONNECT".
Now you can open your application on the device and proceed with performing all the user actions you would like to record. If everything is configured correctly, the application should work normally while WAPT should start showing HTTP requests being recorded.
iOS (iPhone, iPad)
-
Find Settings on your iOS device and tap "Wi-Fi":
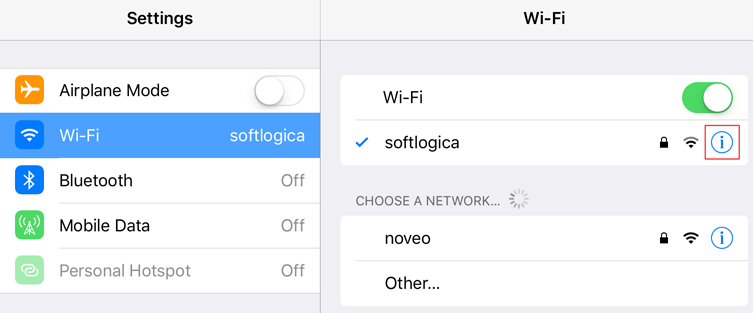
- Select your current Wi-Fi connection and tap its icon for details.
-
Specify HTTP proxy settings for the selected Wi-Fi connection:
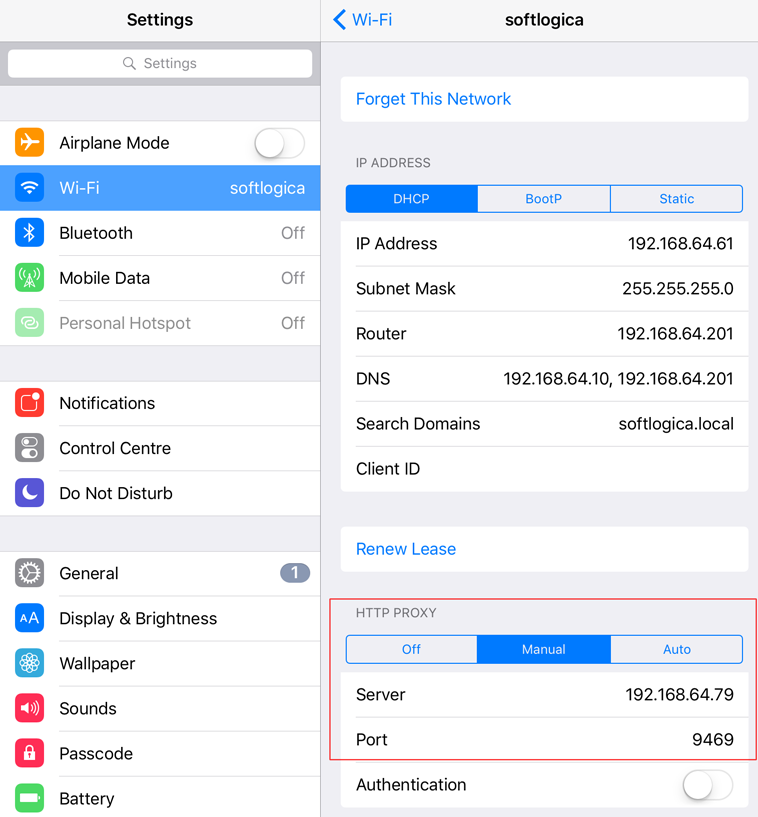
Select the "Manual" mode.
Server: specify the server name or IP address of WAPT Recorder (the one shown in the Recorder message above).
Port: specify the port number of WAPT Recorder (the one shown in the Recorder message above).
Now you can open your application on the device and proceed with performing all the user actions you would like to record. If everything is configured correctly, the application should work normally while WAPT should start showing HTTP requests being recorded.
Recording of HTTPS sessions
The use of secure (HTTPS) connections by mobile applications is becoming very common. Such connections are protected from the 3rd party interception.
Any regular proxy server would become a man-in-the-middle for such connection and would not get access to the data being transmitted. That is why
when an HTTPS connection is established through the WAPT Recorder proxy, it works in a very special way: it pretends to be the client device or browser
for the server. At the same time it pretends to be the target server for the client. It decrypts all data received from either party, records it and
encrypts again to send further to the peer.
Encryption and decryption is performed with the help of certificates. The problem is that when the client application receives data encrypted by the WAPT proxy,
it should trust WAPT Recorder certificate that actually confirms the validity of the data origin. Because of the nature of HTTPS connections, such "deception"
is the only way to record the data.
Secure websites are recorded the same way. WAPT installs its certificate on the system automatically (a security prompt is shown during the process,
of course). In case of mobile recording you need to do the same installation on the device manually. The certificate file is named "certificate.cer".
It is located in the WAPT installation folder. You can take it from that location and install on the device as described further.
Android
- Save the "certificate.cer" file to your mobile device. You can either connect your device via USB to the WAPT system and copy the file,
or send it by email that you can open on the device. If you open the certificate file from an email, you get directly to step 5 below.
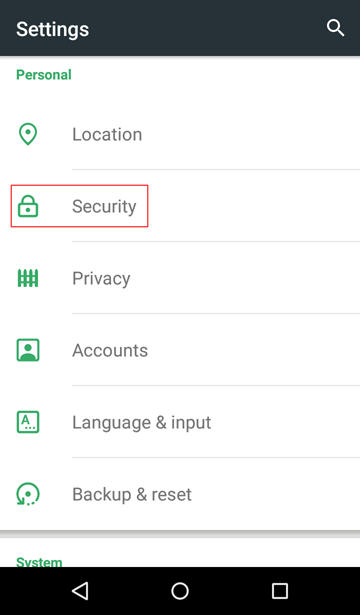
- Find the security settings on your mobile device. This item may be right inside the Settings or in the "Other security settings" subgroup.
If you do not see it, search for "security" or "certificates".
-
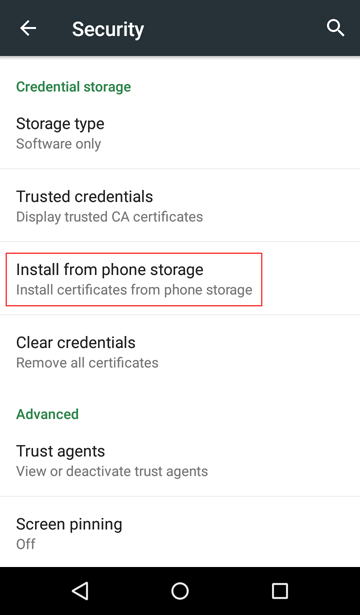
On the Security screen find the "Credential storage" section and tap "Install from phone storage":
- Tap the certificate file in the list of files.
-
On the next screen enter the certificate name (you can choose any name, not necessarily the one shown below) and choose "VPN and apps":
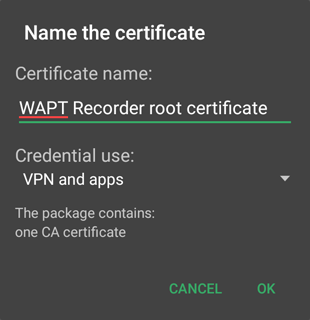
Tap "OK".
- You may need to restart your Android device for changes to take effect.
To check that certificate was successfully installed:
-
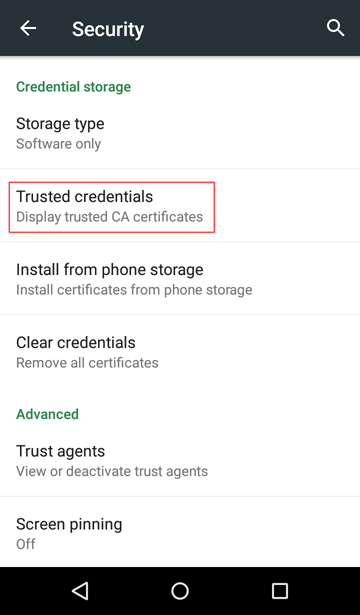
Get to the security settings. Tap "Trusted credentials" on the Security screen:
-
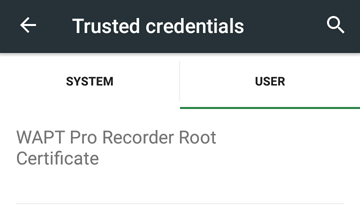
If the certificate is successfully installed, you will see its name on the USER tab:
Now you can record HTTPS sessions from that device.
Additional note for Android 7 and later
Additional security measures introduced in Android 7 may forbid the use of installed user certificates for SSL connections. To overcome this restriction you may need to rebuild your application with the proper network security configuration as described here: https://developer.android.com/training/articles/security-config.html.
iOS (iPhone, iPad)
Follow the steps below to install the Recorder root certificate on your iOS device.
- Send an email to your own address and attach the "certificate.cer" to it.
- Open the email on the device.
-
Tap the attachment to install the certificate.
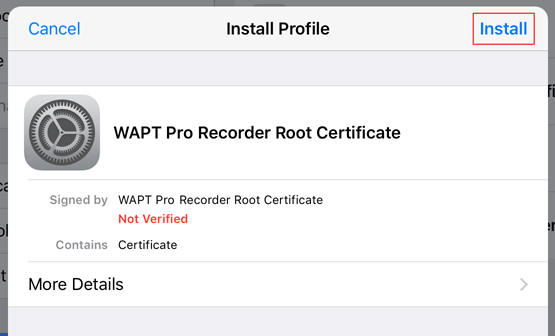
-
Tap "Install". A warning message will appear:
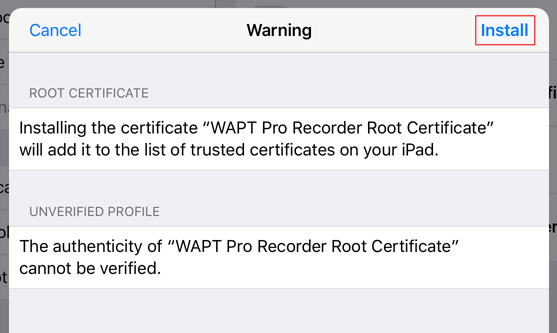
-
Tap "Install" again.
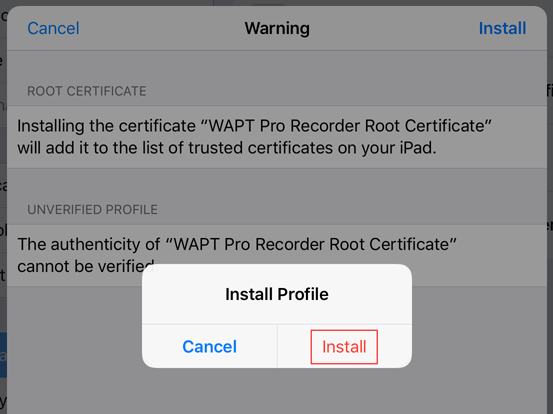
- Confirm the installation of the certificate.
- If the installation is successful, you will see the following notification (certificate is now verified):
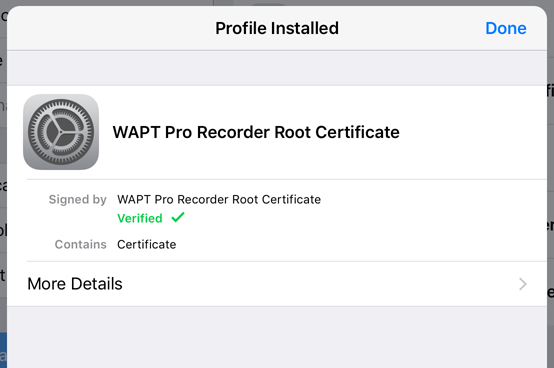
To check that certificate was successfully installed:
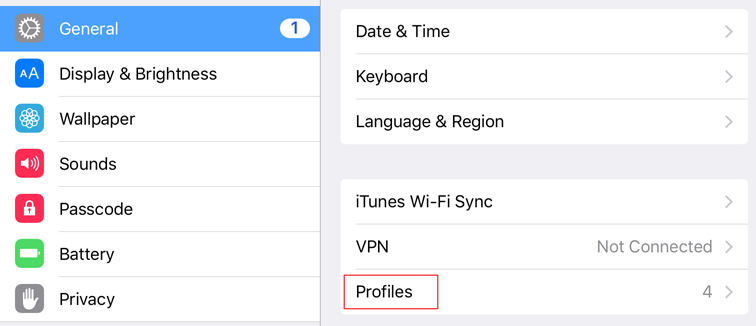
- Tap "Profiles" in General settings:
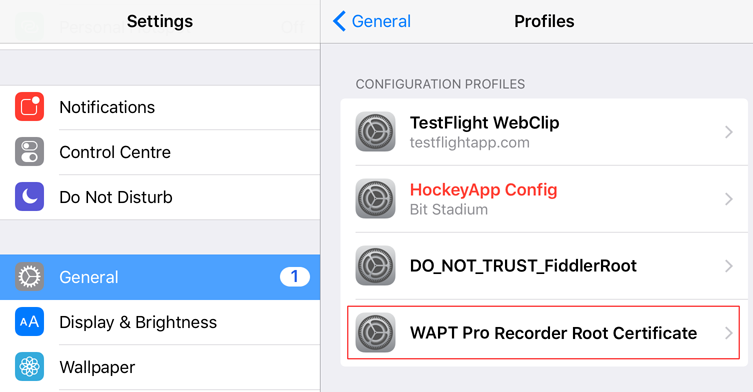
-
Select WAPT Pro Recorder Root Certificate in the list of certificates.
-
You will see the certificate details. If the certificate is successfully installed and verified, the following information is displayed:
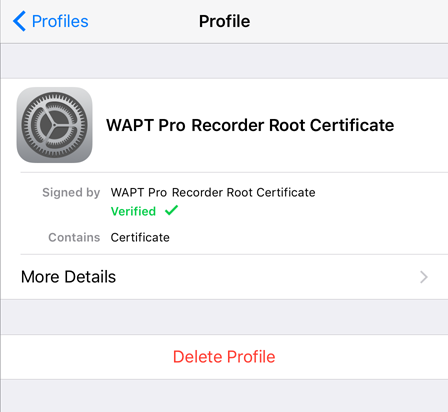
Now you can use your mobile device to record HTTPS sessions with WAPT.
Additional note for iOS 10.3 and later
In iOS 10.3 and later, when you install a certificate, it is not automatically trusted for use with HTTPS connections. You need to manually turn that feature on.
Go to Settings > General > About > Certificate Trust Settings. Under "Enable full trust for root certificates", turn on trust for the certificate.
For details see https://support.apple.com/en-nz/HT204477.
![]()